Monday, October 27, 2014

Old Tray New Tray


My husband and I received, from a former co-worker who is no longer with us, a lovely white porcelain formed tray with leaves inlaid around the edges. 

Years ago the edge chipped but I was able to superglue it back together . I have used it from time to time but the corner edge has started to look too shaby. I planned to discard it but then thought of this:
And I remembered I had this:
A packet of fancy napkins. Note, these napkins can usually be separated into three sheets like this:
Using only the printed sheet and mod podge and a soft brush I did this:
I did the underside too . Its starting to look good! Be sure to work out the air bubbles that form . A pin works well here.
I will do 3-4 coats of the glue. Then I plan to seal it with a food safe urethane. I love it again. Not dishwasher safe but pretty and wipeable ! Yay!

Quilt number 4


With a friends quilting books and a few templates from the books, I started to make my own sampler. Here is what I put together.


I used a white sheet and other scraps with copies of templates the books showed. I used different books which resulted in different size squares. I wound up adding boarders to each square to get all square to be 14 in x 14 in. Arranging them like this was my plan but decided to consolidate the darker colored squares in the center as seen in the picture below this one.


From this point I made double strips between each square with a 4-square piece in the corners. This took a considerable amount of time, but once put together,quilted, and binded, it looks like this:


My plan is to used some of the board material to make king pillow shams. When they are in the works I will share.


And here they are...


Friday, March 14, 2014

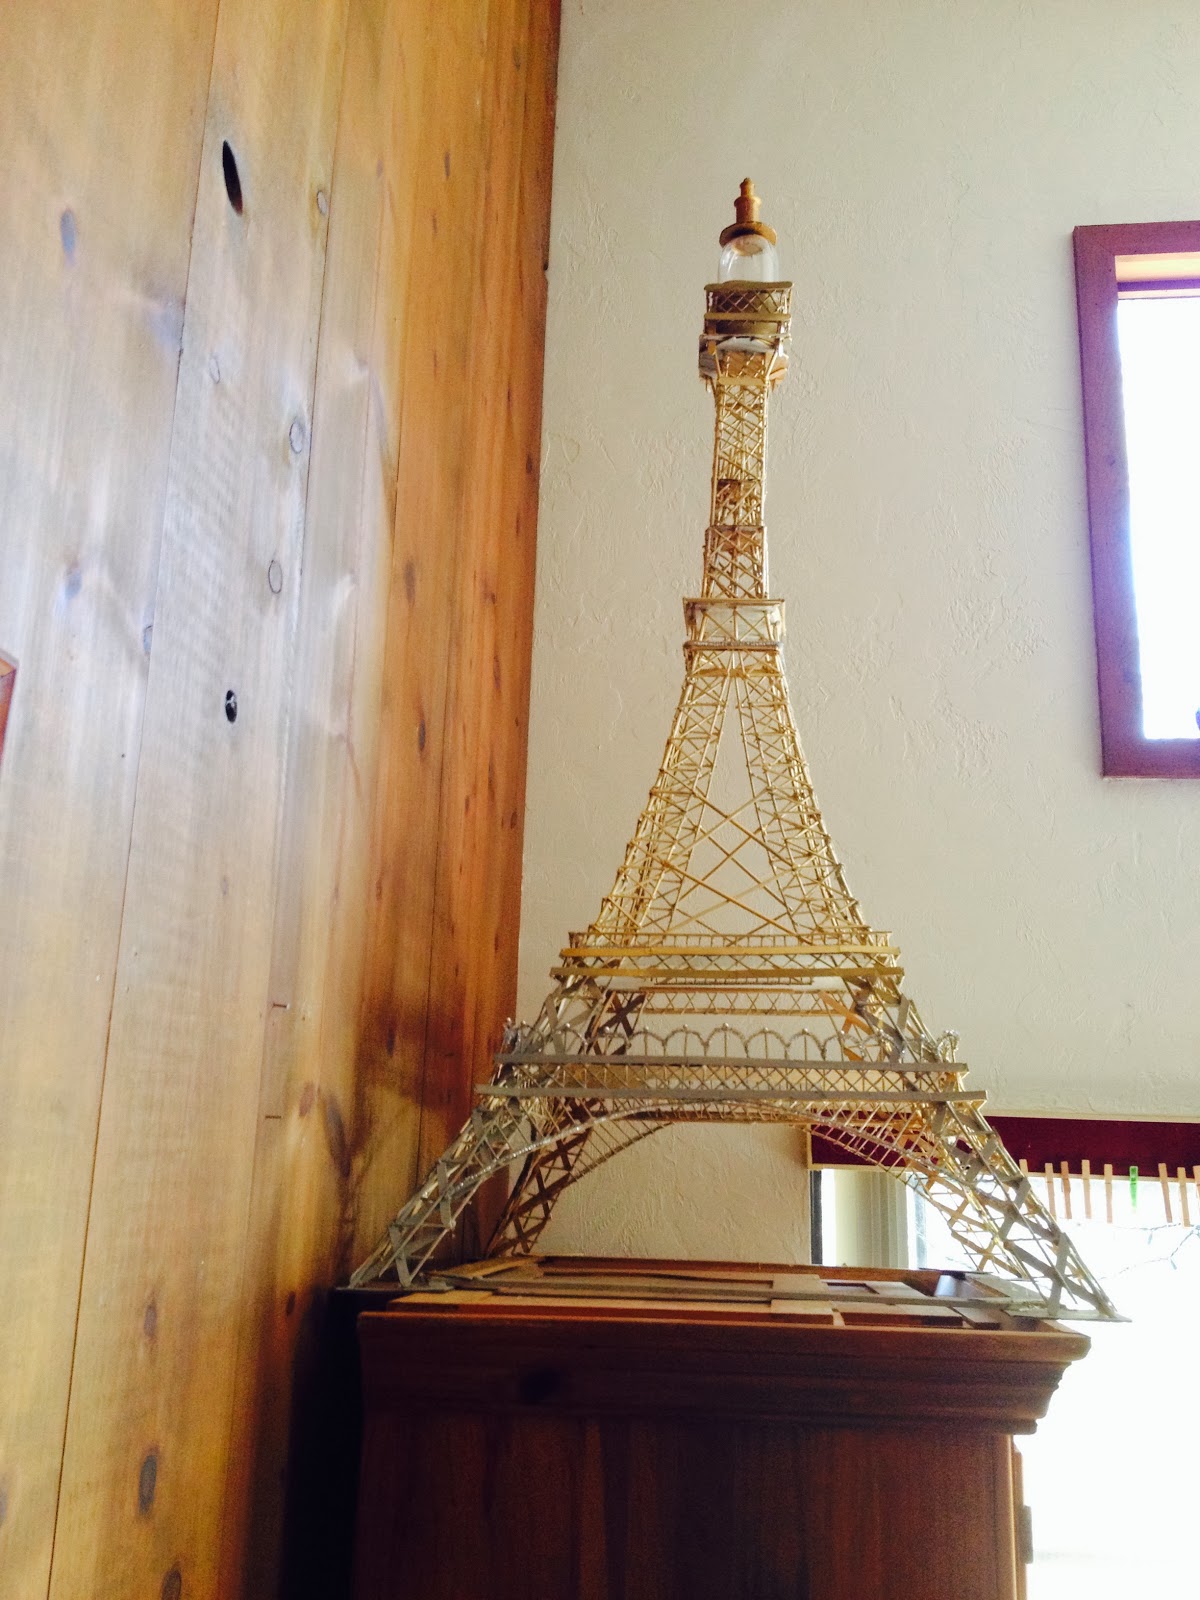
The Tower for 'April in Paris'

Hi again, so what did I do this time? Good grief I keep busy. My husband has developed a new expression to get my attention. It is "Amy, move away from the tower!" I will explain here:

I am in a group of women who prepare a table for a fund raiser to benefit the Girls Club of Alachua County. Each year we decorate a table pertaining to a theme.  This year our table captain wanted to do "April in Paris"! She wanted the Eifel Tower for the center piece.

The day after  brainstorming session withe the ladies, and some engineering analysis from my super fabulous husband, I set to work. ( He also went to Lowes with me, late that night,to get supplies.) Here are some pictures I used as I set to work:
Using  a scaled picture from the internet, we developed  a scale with four main floors: base, one, two,three, top.


Above are some of our high tech proportions . In order to get a well proprtioned tower , with an 18 inch base, my tower would be incredibly unstable. I had to modify. I had to increase the base substantially. 
The gray first floor shown above was initially suppose to be the ground floor 18x18 ...not anymore!

The finished tower was about 60 inches tall and 29 inches square!


At this point I was thinking of painting the lower cardboard box to look like the lower part of the Eiffel Tower, but as you will see, I changed my mind on that too.

Above, I have inserted the 48 inch long flexible wood dowels, from the late night trip to Lowes, through small holes pushed into two pieces of square corrugated cardboard, (18 inch x 18 inch) and (abt 10 inch x 10 inch). Maneuvering the sticks and "floors" in such a way as to create a stable structure. At this point I noticed 2 things:
1) I needed a more stable base and 
2) The sticks really wanted to spin around themselves and lock at the top. I am sure there is an engineering explanation for this twisting action. 
At this point,I built the base from some slats I had in the garage and built anchor pads  for each corner.
Above you see I used popsicle sticks and a hot glue gun to start my corners. 

Above is where I developed a tower top and used an extra piece or two of cardboard to keep the twisted effect in check.

These upper levels wanted to spin . I cross braced and used multiple cardboard pieces to stabilize.
Now, I set to work with these:


And these in view:

And developed this:


I am beginning to think my tower is too short. I had to make it taller so I built a shelf to put the upper tower on:

If you look carefully in the above photo you can see where the 48 inch sticks come together and my upper tower is a separate piece made to look otherwise.
Below is the tower before the ground floor cross beams and viewing platform rails had been completed.


I did cut out the middle of each floor using an exacto knife


Below I begin the first floor arches and start the side rails. Toothpicks were stuck through each floor and stabilized with hot glue and frontage rails.
And I used chop sticks for cross braces, below.

Below shows one floor cut out.


At this point in this adventure, its late:


And time for bed . My husband says to me , with polarizing but very clear anti OCD direction, "Amy, move away from the tower!" This is the slogan for 2014 to redirect me from one activity to another. We laugh about this.

The rest of the pictures begin to show and then do show the finished product. Below I started to prime it with gray paint.


Pipe cleaners and mardi gras beads were used to mimic rails on the viewing platforms.


We did win  trophy for Most Elegant. It really was fun. I have an idea for next year..... No wait , I am up to something else now. 

Wednesday, February 5, 2014

How to make a frame for cloth, or canvas painting


Hi, I wanted to paint a picture of this photo, but I wanted to try and paint it on cloth and  I wanted to paint it way bigger than this 4x6 inch photo.  And no boat!! I like boats but I didn't want it in my painting.

I planned to use acrylics but I didn't have a frame large enough.
What I did have was some of this:
Leftover hard wood flooring from floors put in years and years ago. I had  a number of different lengths and decided to make my own support frame for my canvas.
To do this you will  need :

lengths of wood, a circular saw (ear muffs), ruler, pencil, wood glue and some of these:


I bought these a the local hardware store. As you see, you can use the right angle shaped pieces or the straight. They were the same price so I bought some of both. You need 4 per frame. (One for each corner)
Measure and cut the wood pieces to form your desired frame size. Before attaching the metal corner anchors glue the frame together and leave it alone for a day or so. Some people use clamps but I didn't need to as my frames went together pretty well. I did have to use a circular saw which isn't my favorite tool to use, but after the Appalachian Service Project, last year, I CAN DO IT. Here is one corner glued: (put newspaper under the corners or you will glue the frame to the floor!!

After about 24 hours you are ready to install the corners. I strongly suggest pre-drilling the anchor slots before trying to screw them into the board, especially if you have oak! That stuff is hard! Mark the screw holes of  anchors where you will put them. Be gentle with the frame. Remember it is held together by wood glue only at this point.  Drill the needed holes a tiny bit smaller than the screw diameter.  Use some bar soap on the screws and they will go into the woods without too much  wrist strain. Here is a look:

From here you can use a staple gun to attach a  pre-printed canvas, or cover the frame with a sheet to paint. Prepare the sheet (cloth), to paint , using Acrylic Gesso:
You can dilute this a little but I would paint a number of layers to stiffen up the cloth and make it canvas like.
Use a nice soft brush to create a smooth canvas for your painting. Once it is dried out you can paint at will. Here are a couple of wall hangings I made: First up is the painting of the Rainbow River: It is about 40 x 48 inches.


Crey, my son, thinks the next one is a sunset at Camp Crystal  Lake. He kept this one. I think it is about 24 x 36 inches.

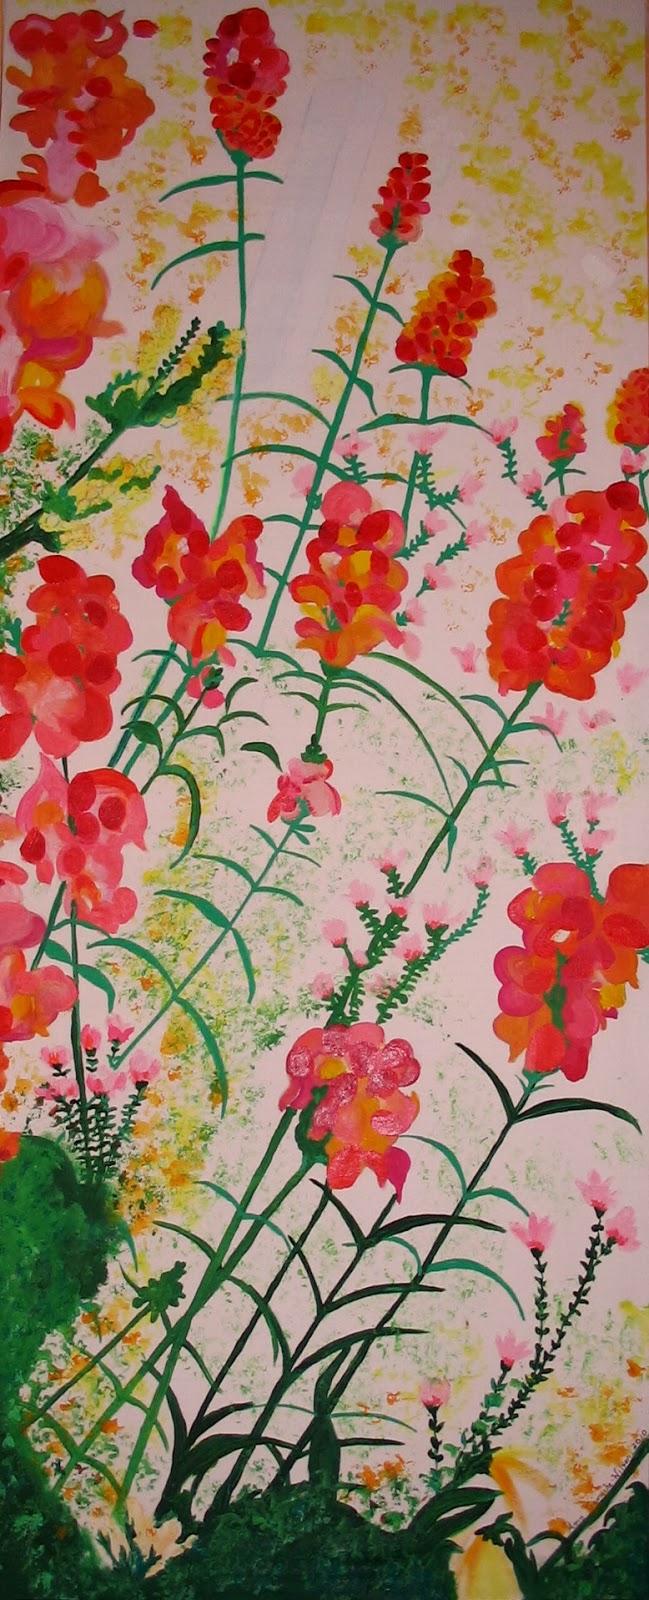
Last, is some fun flowers I liked or saw in a magazine somewhere. This is somewhere in the house here. It measures about 20 x 36 inches.
Go for it !
Have fun. ; > ) Amy


Monday, January 27, 2014

How to Remove the Wine Label

I have a number of crafts-so-hard crafts  I do with wine bottles but before I get into that I need to tell you the first step to wine bottle crafts that led me to another craft project !!! There is always something to do!!! So what did I do this time? Read on, gentle reader.

As I was preparing to do crafts with bottles I needed  to get the label off the bottle and " dag nab it"  all that sticky glue too. Here is my technique:

Step 1: Drink a bottle of wine. That shouldn't be too difficult for you unless, of course, you are not yet 21 years of age.


 If this is your situation, (you are not 21 years old), have your parents drink a bottle of wine. Once the bottle is empty, rinse it out and fill it again with warm to hot water. Submerge the bottle into the tub of warm to hot suds. I use Dawn dish washing liquid.
Now this is important: Set the timer for 5 minutes and then work off the egdes slowly with a sharp razor.  DO NOT  LEAVE THE BOTTLE IN MUCH LONGER!!!
Most labels will come off in  one piece and if you are careful, look like this:
If you leave the bottle in the soap suds for too long, somehow the label re-adheres to the bottle and the only way off is in pieces ( the label  just shreds and it is a mess)
If there still seems to be some glue, dry the bottle and apply a little bit of this:
Rub off the goo gone with a dry soft cloth and Voila!

Now you have a clean bottle and a cool label. I collected a bunch of labels and created this with a board, some 14 cent white tiles, caulk, grout, modge podge and urethane. I will go over how I made this in another post called  A Wicker Trunk Table Topper or something like that.


 Now I can place glasses on top of this wicker trunk and they won't tip or leak into the basket. :) How cool is that? And, no I did not drink all of those wines.